
Adding users
Adding users is how you bring new team members into your Jestor workspace. You choose the seat type (Member or Builder), enter one or more emails, and assign a role before sending the invite.
How to add a user
Step 1 — Open User Management
Open the search bar and type users, then press Enter to go to users management. You can also access it through the sidebar or Settings. You can also access through the home page.

Step 2 — Click Add User
In the top-right corner of the Users page, click the Add User button.
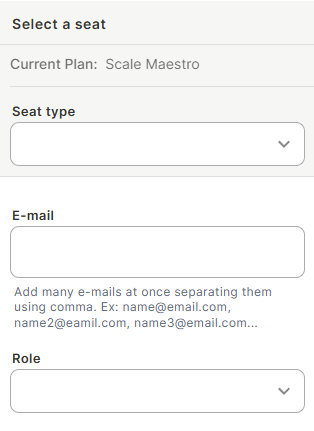
Step 3 — Select the seat type
In the Seat type dropdown, choose between:
- Member — for users who will use the workspace (access tables, apps, dashboards)
- Builder — for users who will build in the workspace (create tables, automations, apps)
Step 4 — Enter the email(s)
Type the email of the person you want to invite. To invite multiple people at once, add several emails separated by commas.
Example: [email protected], [email protected], [email protected]
Step 5 — Select the role
In the Role dropdown, choose the role profile that defines what this user can see and do in the workspace.
Step 6 — Send invite
Click Send invite. Each email will receive an invitation to join the workspace.
Keep in Mind
- If you run out of seats, you will not be able to add new users until a seat is freed or your plan is upgraded.
- The role you select applies to all emails added in the same invite. To assign different roles, send separate invites.
- Invited users only appear in User Management after they accept the invite and activate their account.
- Adding a user does not automatically give them access to every table or app — access is controlled by their role profile.
FAQ
1 — Can I invite more than one user at the same time?
Yes. Enter multiple emails in the E-mail field separated by commas, and they will all receive the invite with the same seat type and role.
2 — What is the difference between Member and Builder?
A Member uses the workspace (works with existing tables, apps, and dashboards). A Builder can create and edit the workspace structure — tables, fields, automations, and apps.
3 — What happens if I don't have enough seats?
You will not be able to send the invite. You can free a seat by deactivating an existing user or upgrade your plan to increase the seat limit.
4 — Can I change a user's seat type or role after inviting them?
Yes. Open the user in User Management and update their seat type or role at any time.
5 — The invited user didn't receive the email. What do I do?
Ask them to check their spam folder. If the invite is still missing, you can resend it from User Management by opening the user's profile.
6 — Do invited users count toward my seat limit immediately?
Yes. As soon as the invite is sent, the seat is reserved for that user, even before they accept it.
Updated 3 months ago