
Checklist
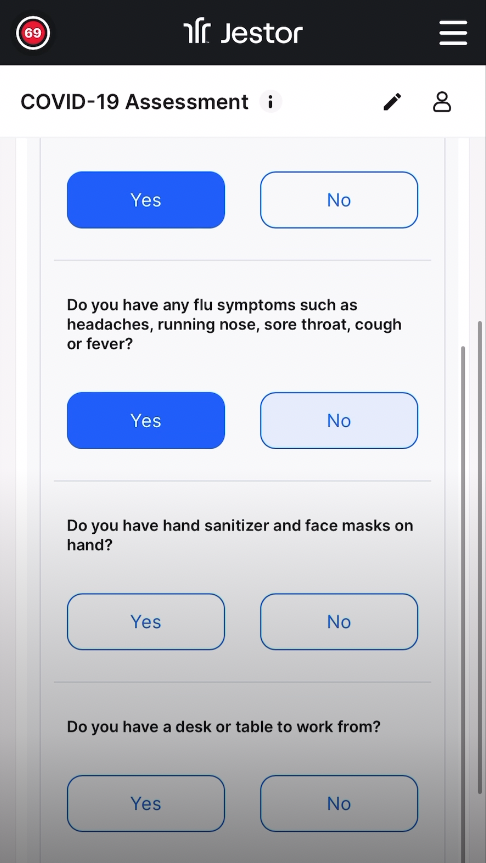
The Checklist field lets you create structured lists of questions inside a record. Users answer each item directly from the table or form view, and responses are tracked visually — making it easy to monitor compliance and process adherence across your team.
For instructions on how to access field types or how to add one, see Field Types.
Capabilities
- Create multiple checklist items, each with its own question
- Choose between four response styles: Checklist, Yes or No, Happy and Sad Face, or Custom Answer
- Require observations when an answer is negative or positive
- Mark individual items as required
- Add a tooltip to guide users during filling
- Track response progress visually in the table view
Use Cases and Examples
- Operations teams can add a checklist to a process table to ensure every step is completed before a record moves to the next stage — for example, verifying that a delivery was packed, labeled, and dispatched.
- Quality teams can use the checklist during inspections to register conformity per item, with required observations when something is flagged as negative.
- HR teams can attach a checklist to an onboarding record to confirm that each step — account creation, equipment delivery, training — was completed.
- Field teams can fill in checklists from mobile during visits or audits, combining checklist items with file attachments in the same form.
How to Set It Up
Step 1
Access the field creator: In table mode, click the + in the last column header or press F to open the field menu.
Step 2
Select Checklist: Search for or scroll to the Checklist option and click on it.
Step 3
Name the field: Enter a name for the field. This is the column header shown in the table.
Step 4
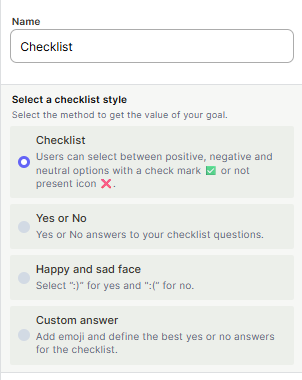
Select a checklist style: Choose how users will respond to each item.
| Style | Description |
|---|---|
| Checklist | Users can respond with positive ✅, negative ❌, or leave the item unanswered (neutral). Unlike the other styles, this is the only one that supports a three-state response. |
| Yes or No | Simple Yes or No answers for each question |
| Happy and Sad Face | ":)" for yes and ":(" for no |
| Custom Answer | Add an emoji and define your own yes or no labels |
Step 5
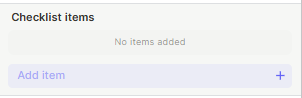
Add checklist items: Type the question in the input box and click + or press Enter to add it. Repeat for each item.
Step 6
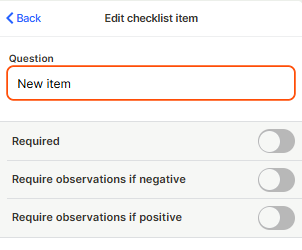
Configure each item (optional): Click on any item to edit it. Each item supports:
- Question — The text of the question shown to the user
- Required — Forces the user to answer this item before saving
- Require observations if negative — Forces a comment when the answer is negative
- Require observations if positive — Forces a comment when the answer is positive
Step 7 (optional)
Enable tooltip: Toggle the tooltip on and enter a short description to guide users when they hover over or focus on the field.
Step 8 (optional)
Mark as required field: Toggle Required field on to make the entire checklist mandatory before saving a record.
Step 9
Click Create.
Keep in Mind
- The Checklist style (the first option) supports three states per item: positive, negative, and neutral (not yet answered). The other styles only support two explicit states. Use Checklist when a pending or unanswered state is meaningful in your workflow.
- The Checklist field does not support branching logic — it cannot show or hide items based on previous answers
- It is not possible to attach files directly inside a checklist item — file attachment requires a separate field in the form
- The checklist style cannot be changed after the field is created without deleting and recreating it
- Observations required on negative or positive answers are configured per item, not globally for the whole checklist
- The field does not calculate a score or percentage automatically — what you see in the table is the visual status of each response, not a computed metric
- It is not possible to reorder checklist items after creation by drag and drop in all views
FAQ
1 — Can I use the Checklist field inside a form?
Yes. The Checklist field works inside forms and is optimized for mobile use. You can combine it with other fields like file attachments or signatures in the same form.
2 — Can I make only some items required, not all of them?
Yes. Required is configured per item. When editing a checklist item, toggle Required on only for the items that must be answered.
3 — What is the difference between the Checklist style and Yes or No?
The Checklist style allows three states: positive, negative, and neutral (not answered), and uses check mark icons. Yes or No allows only two explicit states and displays text labels. Use Checklist when a neutral or pending state matters; use Yes or No when the answer must be definitive.
4 — Can I change the checklist style after the field is created?
No. The response style is defined at creation and cannot be changed afterward. If you need a different style, you will need to delete the field and create a new one.
5 — Is it possible to see all checklist responses across records in one view?
You can see the response status per record in the table view. For aggregated analysis across all records, you would need to use a formula field or an automation to extract and consolidate the data.
Updated 3 months ago