
Select a User based on Instructions (ChatGPT)
Analyze a set of instructions and a request, then automatically select the most appropriate user from a defined pool. It is useful for routing tasks, assignments, or approvals to the right person based on dynamic criteria defined in natural language.
When to Use
- You need to automatically assign a record to a user based on rules written in natural language
- You are building approval or task-routing flows where the responsible person depends on context
- You want to replace manual assignment with an AI-driven decision based on user attributes or availability
How to Configure
Step 1
Create a new automation: This page covers only the action. For instructions on how to access automations and create a new automation, see the Automations page.
Step 2
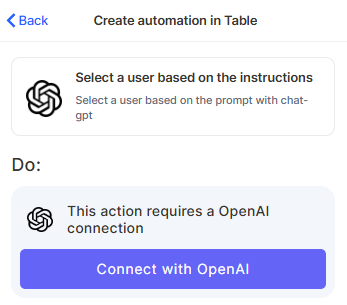
Choose the action: In the action search bar, type user chat-gpt and select Select a user based on the instructions.

Step 3
Connect your OpenAI account: This action requires an OpenAI connection. Click Connect with OpenAI and authorize access.
Step 4 (optional)
Choose tab: Select the table that contains the records you want to work with.
Step 5 (optional)
ID of your record: Map the field that holds the ID of the record you want to update with the selected user.
Step 6 (optional)
Choose multiple user or record attribution field: Select the field where the selected user will be saved. This field must be a user or record attribution type.
Step 7
Input the instructions: Write the instructions that ChatGPT will follow to compare and evaluate the candidates. Describe the criteria clearly, for example: "Select the user responsible for the finance department" or "Choose the user with the least open tasks".
Step 8
Input the request: Describe the specific request or context that must be decided. This is the input ChatGPT will use alongside the instructions to make the selection.
Step 9
Choose which users can be selected: Define the pool of users that ChatGPT can choose from. Only users included here are eligible to be selected.
Step 10 (optional)
Max output tokens: Set the maximum number of tokens for the model's response. Leave empty to use the default. This controls how detailed the model's reasoning can be.

Step 11
Save: Click Save to apply the automation.
Keep in Mind
- The action does not read real-time data about users (such as current workload or availability) unless that information is explicitly passed in the instructions or request fields.
- The action does not assign the user to a record automatically unless you map a field in the Choose multiple user or record attribution field step.
- The action does not validate whether the selected user exists in the record or has the right permissions — it only returns a user based on the instructions.
- If the user pool is empty or not configured, the action may return no result or behave unexpectedly.
- An OpenAI connection is required. The action cannot be saved or executed without an authorized OpenAI account linked.
- The quality of the selection depends entirely on how clearly the instructions and request are written. Vague or conflicting instructions will produce inconsistent results.
FAQ
1 — Can ChatGPT select more than one user at a time?
The action is designed to select a single user. If you need to assign multiple users, you would need to run separate automations or handle the logic through additional steps.
2 — What type of field should I use to save the selected user?
The field must be a user attribution field.
3 — Can I pass dynamic data (like record fields) into the instructions?
Yes. You can map record fields into the Input the instructions and Input the request fields to make the prompt dynamic and context-aware.
4 — What happens if ChatGPT cannot decide based on the instructions?
If the instructions are ambiguous or the request does not match any user in the pool clearly, the action may return an empty result or an unexpected selection. Always test with representative inputs before going live.
5 — Does this action notify the selected user?
No. The action only selects and saves the user to a field. If you need to notify the user, add a separate notification action to the same automation flow.
Updated 4 months ago