Import your data and create a new Table
Create tables from your data lightning fast
Setting up the data import
It's time to create the table and upload it!
You can do that by clicking on the Upload data icon on the builder bar.
Types of Connection
Now there will be three types of connections for you to choose from:
- The first one is Migration - to import your data and create a new Table
It'll bring your data from your spreadsheet once. and you'll only be able to update your data using Jestor and then transform your spreadsheet data into a database
You can start migration by clicking on the blue button on the right side
Organizing your data checklist
To create a table from a spreadsheet file, first, you must organize the information in the proper format. Don't worry too much: chances are, your spreadsheets are probably already organized similarly.
There's only two things you have to worry about:
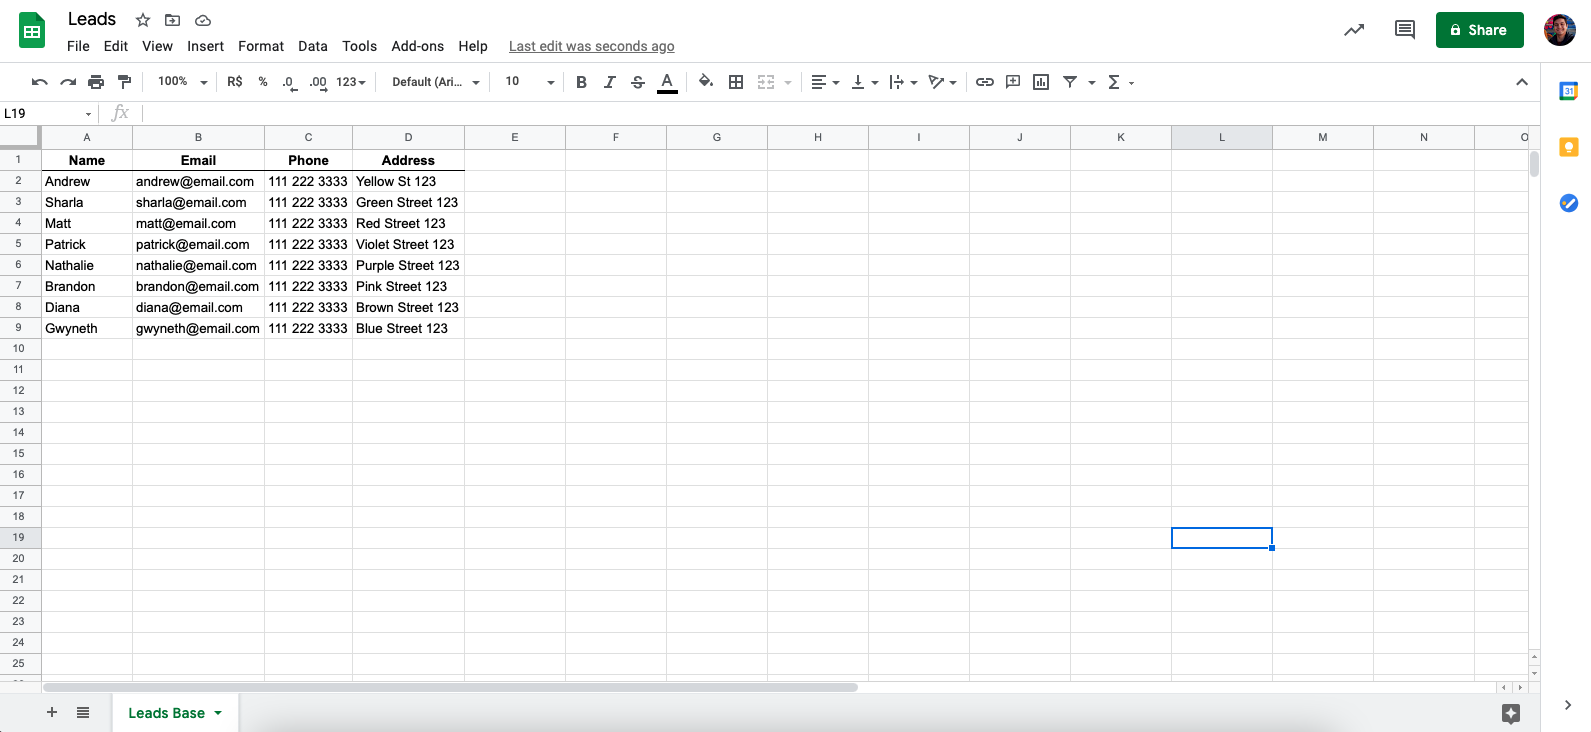
- The spreadsheet organizes information in a table structure. That is: having a header with column titles, with each column being a type of information and each row being a separate data entry;
- All the information you want to upload to a table must be contained on a single tab of the spreadsheet.
To give you a clear example, this is a proper format for uploading:

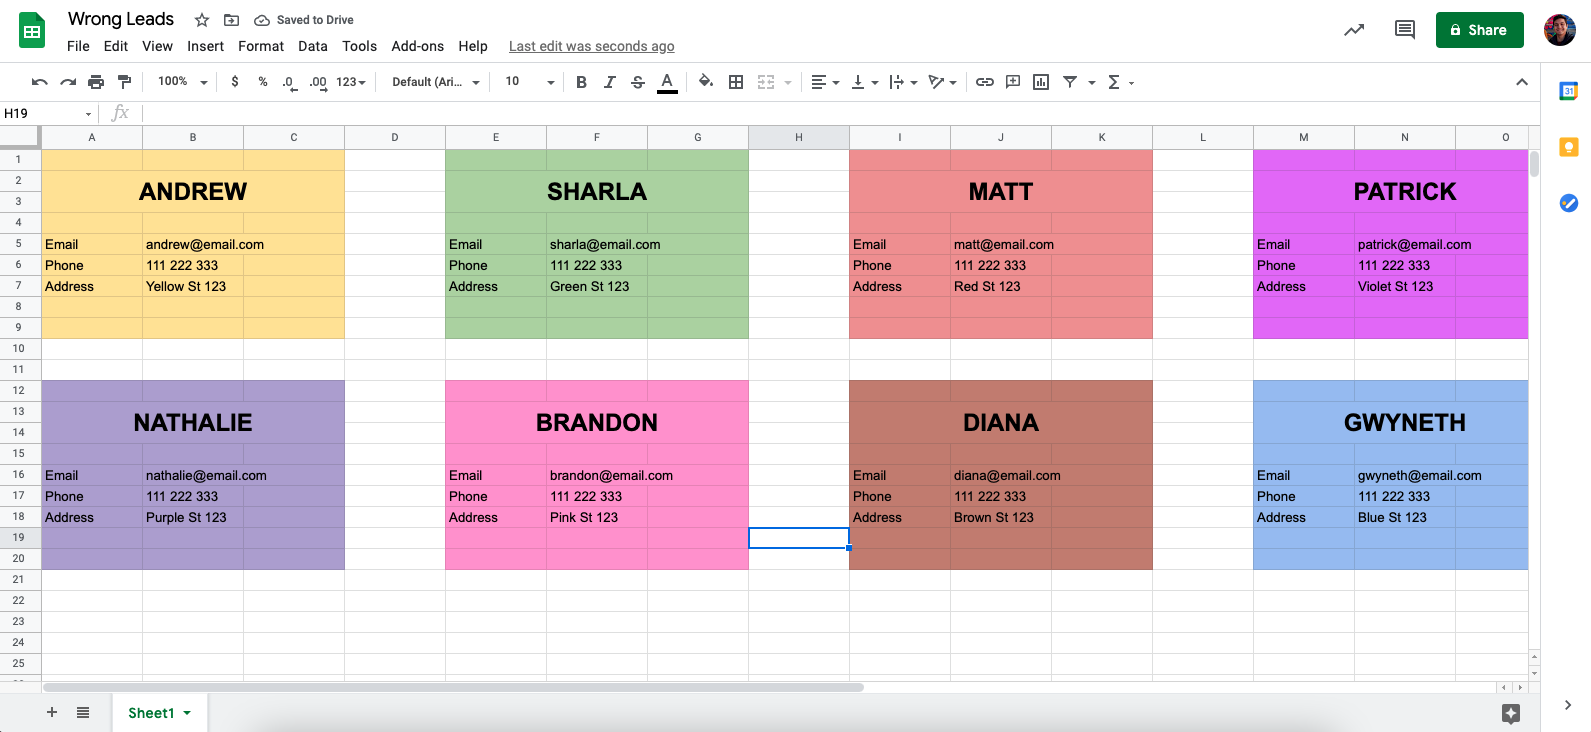
This, however, is not:

So, in order to continue migration, you'll have to check all these three confirmations:
-
All the variables are organized in columns?
In order to transform your spreadsheet in a database, you need to rearrange your variables into columns. -
All the variables have the same format and unit type?
You cannot have a number and a text on the same column. -
Check if the type of data you are importing is supported by Jestor
Jestor does not have a seconds field, for example.
Field matching
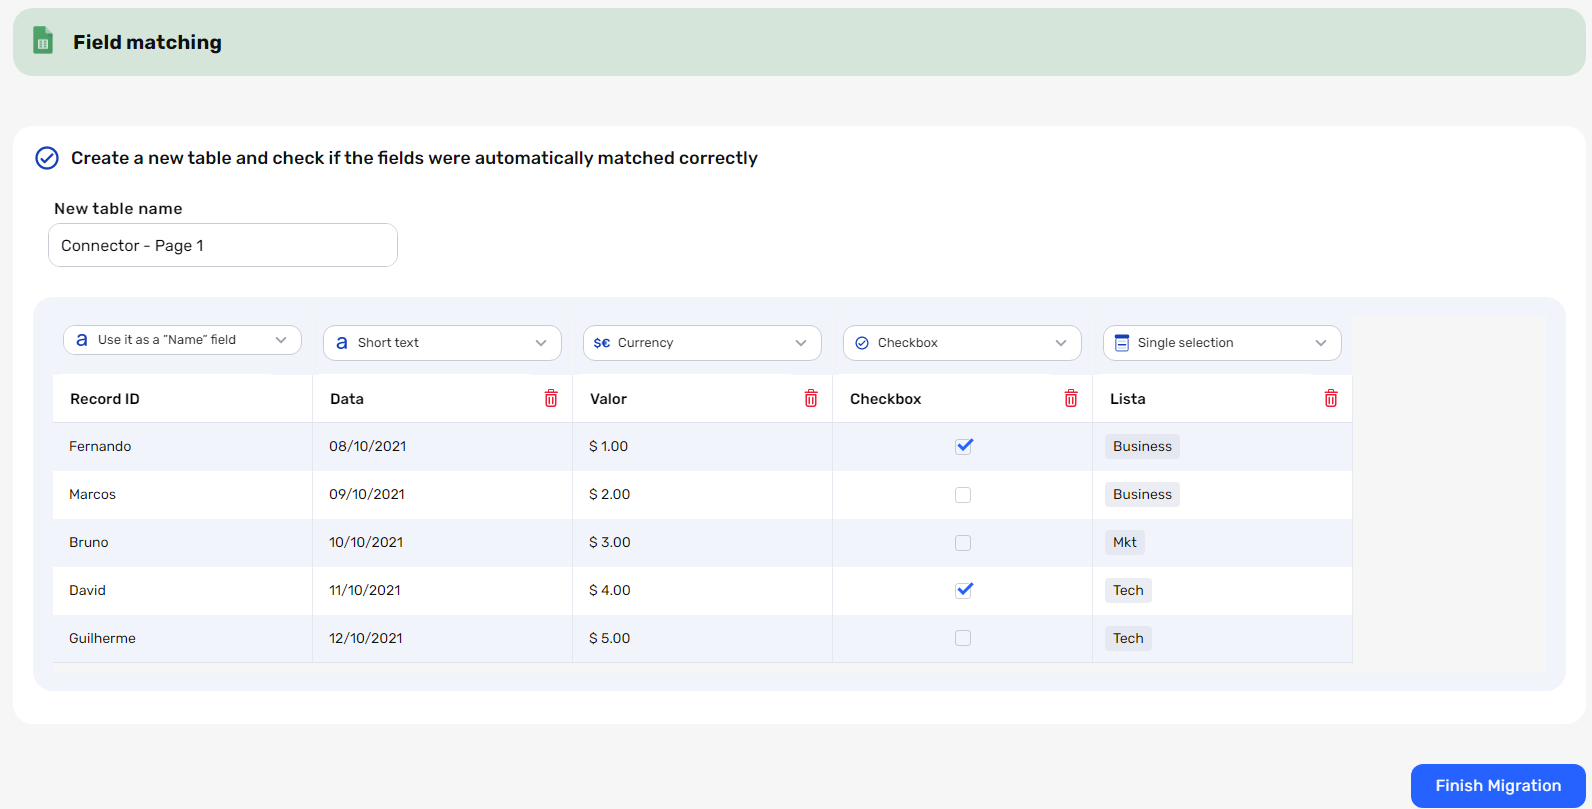
We're almost there! Now, we'll create a new table and check if the fields were automatically matched correctly
First, choose your new table name!

You can now change the name of your table, as well as the name and type of the fields. That way, if jestor suggests Short text as a field type, but you think that kind of information makes more sense as a Single select field, you can just correct it before your upload.
When everything's just the way you like it, click on "Finish Migration". This will start the process of creating your table and uploading your data.
Don't worry if it's a lot of information to upload: you can keep using jestor normally while it's importing your data and you'll receive a notification in your browser, mobile, or desktop App as soon your new table is available.

As soon as it's finished, you'll have a brand new table with all your data available.
Did we mention that all of this counts a one single action? This is a great way to build the initial structures for your jestor in a quick, efficient manner.
Updated 3 months ago
