
Email Agent
The Email Agent reads incoming emails, replies automatically, and can create or update records in your Jestor tables — without any manual intervention.
What is it
The Email Agent is an AI-powered agent that connects to a table's email inbox. When an email arrives, the agent reads it, decides how to respond based on your instructions, and sends a reply. Depending on how you configure it, it can also create new records in the table or update existing ones.
It lives in the same Agent Builder used for Chatbot and WhatsApp agents, and it works on top of the Table E-mail feature — meaning the table must have an active email address before the agent can do anything.
Capabilities
- Read incoming emails automatically — the agent monitors the table inbox and processes every email that arrives after activation
- Reply to emails using your data as context — responses are grounded in the connected table records and any context links or files you provide
- Create new records from incoming emails — each new email can automatically open a record in the table (e.g., a support ticket)
- Update existing record fields — the agent can fill or modify fields you explicitly allow, based on information extracted from the email content
- Follow custom reply instructions — define tone, structure, and constraints to shape how the agent responds
- Use context links and files — supplement table data with external URLs or uploaded documents (FAQs, pricing tables, policy docs)
- Draft replies for human review — enable monitored mode so the agent writes replies as internal comments instead of sending them directly
When to use
Use the Email Agent when you want to:
- Automatically reply to incoming emails using context from your Jestor data
- Create a new record for every email that arrives (e.g., opening a support ticket from a customer email)
- Update a record's fields based on information extracted from the email content
- Handle high volumes of email without manual triage
How to configure
Step 1
Activate Table E-mail
Before creating the agent, the table must have an active email address. To set it up, follow the steps in Table E-mail.
Once the table email is active, come back here and continue from Step 2.
Step 2
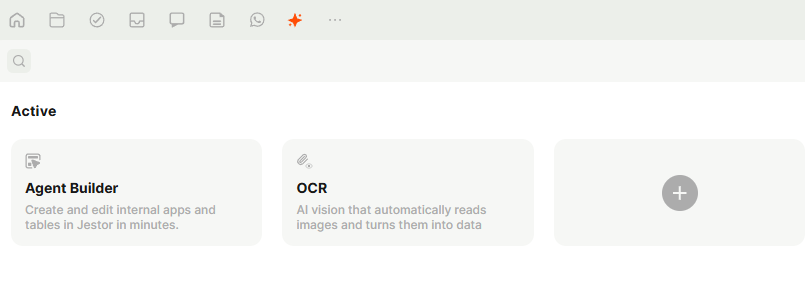
Go to the AI section in the left sidebar and open Agent Builder. Click the + button to create a new agent. You can also find and access your existing agents from the Folders page, under the Agents section.
Step 3
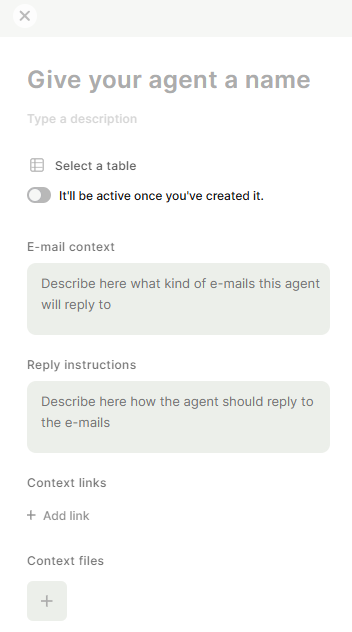
In the modal, select Email as the agent type.

Step 4
Fill in the agent settings:
- Name — give your agent a clear name (e.g., "Support Inbox Agent").
- Description — optional, but useful if you have multiple agents.
- Select a table — choose the table that has Table E-mail activated. The agent will monitor that table's inbox.
- Active toggle — turn this on if you want the agent to start working immediately after creation.
- E-mail context — describe what kind of emails this agent will receive and handle. This helps the AI understand the scope (e.g., "This agent handles support requests from customers asking about order status and delivery issues.").
- Reply instructions — describe exactly how the agent should respond (tone, structure, what to include or avoid). Be specific. (e.g., "Reply in a friendly but professional tone. Always confirm the customer's issue before providing a solution. Do not promise specific deadlines.").
- Context links — add URLs the agent should use as reference when composing replies (e.g., a help center page or product documentation).
- Context files — upload files the agent can reference, such as FAQs, pricing tables, or policy documents(.txt only).
Step 5
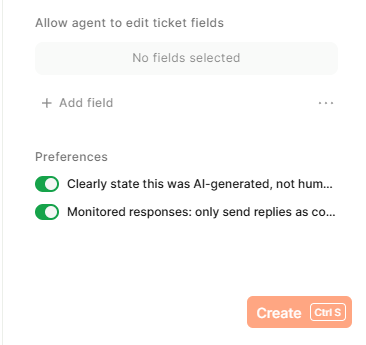
Allow field editing (optional)
Under Allow agent to edit ticket fields, click + Add field to select which fields in the table the agent is allowed to modify when processing an email.
Use this when you want the agent to automatically update record fields — for example, setting a "Status" field to "In Progress" or filling a "Category" field based on email content.
Step 6
Set preferences
Two preferences are available at the bottom of the configuration form:
- Clearly state this was AI-generated, not human — when enabled, the agent adds a note in its replies informing the recipient that the response was generated by AI. Recommended to keep this on.
- Monitored responses: only send replies as comments — when enabled, the agent drafts replies as internal comments instead of sending them directly. A human can review and send manually. Use this when you want oversight before anything goes out.
Step 7
Click Create (or press Ctrl+S) to save and activate the agent.
Keep in Mind
- Context files must be in .txt
- The table must have Table E-mail activated before the agent can receive or process emails. Creating the agent alone is not enough.
- The agent only processes emails that arrive after it is activated. Existing records in the table are not retroactively processed.
- Field editing only applies to fields you explicitly add under Allow agent to edit ticket fields. The agent cannot modify fields outside that list.
FAQ
1 — Do I need to activate Table E-mail before creating the agent?
Yes. The agent works on top of the Table E-mail feature. Without an active table email address, the agent has no inbox to monitor. Activate it first in the table settings, then create the agent.
2 — What is the difference between "E-mail context" and "Reply instructions"?
E-mail context tells the agent what kind of emails it will receive, it sets the scope. Reply instructions tell the agent how to behave when responding (tone, format, what to include). Both fields work together: context helps the agent decide if an email is relevant; instructions shape how it replies.
3 — Can the agent create new records and update existing ones at the same time?
Yes. New records are created automatically by the Table E-mail feature when a new email arrives. The agent then processes that record and can update its fields based on the email content, as long as those fields are listed under "Allow agent to edit ticket fields."
4 — What happens if I leave "Monitored responses" on?
The agent drafts a reply but does not send it. Instead, the reply appears as an internal comment on the record. Someone on your team needs to review it and send manually. This is useful during the initial setup period to validate the agent's behavior before going fully automated.
5 — Can I use the Email Agent with my existing company email address?
Yes. Under Table E-mail Settings, use the External email field inside Custom email to add your existing address. Emails sent to that address will be redirected to the Jestor table email, creating records and triggering the agent normally.
Updated 4 months ago