
Accessing the Developer Area
Jestor allows you to code custom solutions for your team
In short
- What it is: the Developer Area is where you write and edit low-code functions, triggers and webhooks in Jestor.
- How to access: type Low-Code in the Action Bar.
- What you can do: browse Functions, Triggers, Tables, Webhooks and documentation, open an app-style editor with a code window in the middle, then Save (Ctrl+S, ⌘S on Mac), go back, Clone, or Edit settings.
- Keep in mind: you can also create and edit Python low-code functions and triggers from a prompt with Custom Automation in Agents.
What is it
Jestor is designed to empower every team to build their own solution, no matter how unique. For most use cases, Jestor's no-code features, such as automations and relational database building through the UI, are enough.
However, some processes are complex and highly specific. For those cases, Jestor provides a developer area where users with varying degrees of technical knowledge can create custom solutions using code.
To generate or edit a Python low-code function or trigger through conversation, use Custom Automation in Agents. For automations from a prompt, use Native Automation.
How to access
Type Low-Code in the action bar.

You can also open a function from a Custom Automation chat with Go to function. In the editor, < takes you back to the Developer Area.
The Developer Area
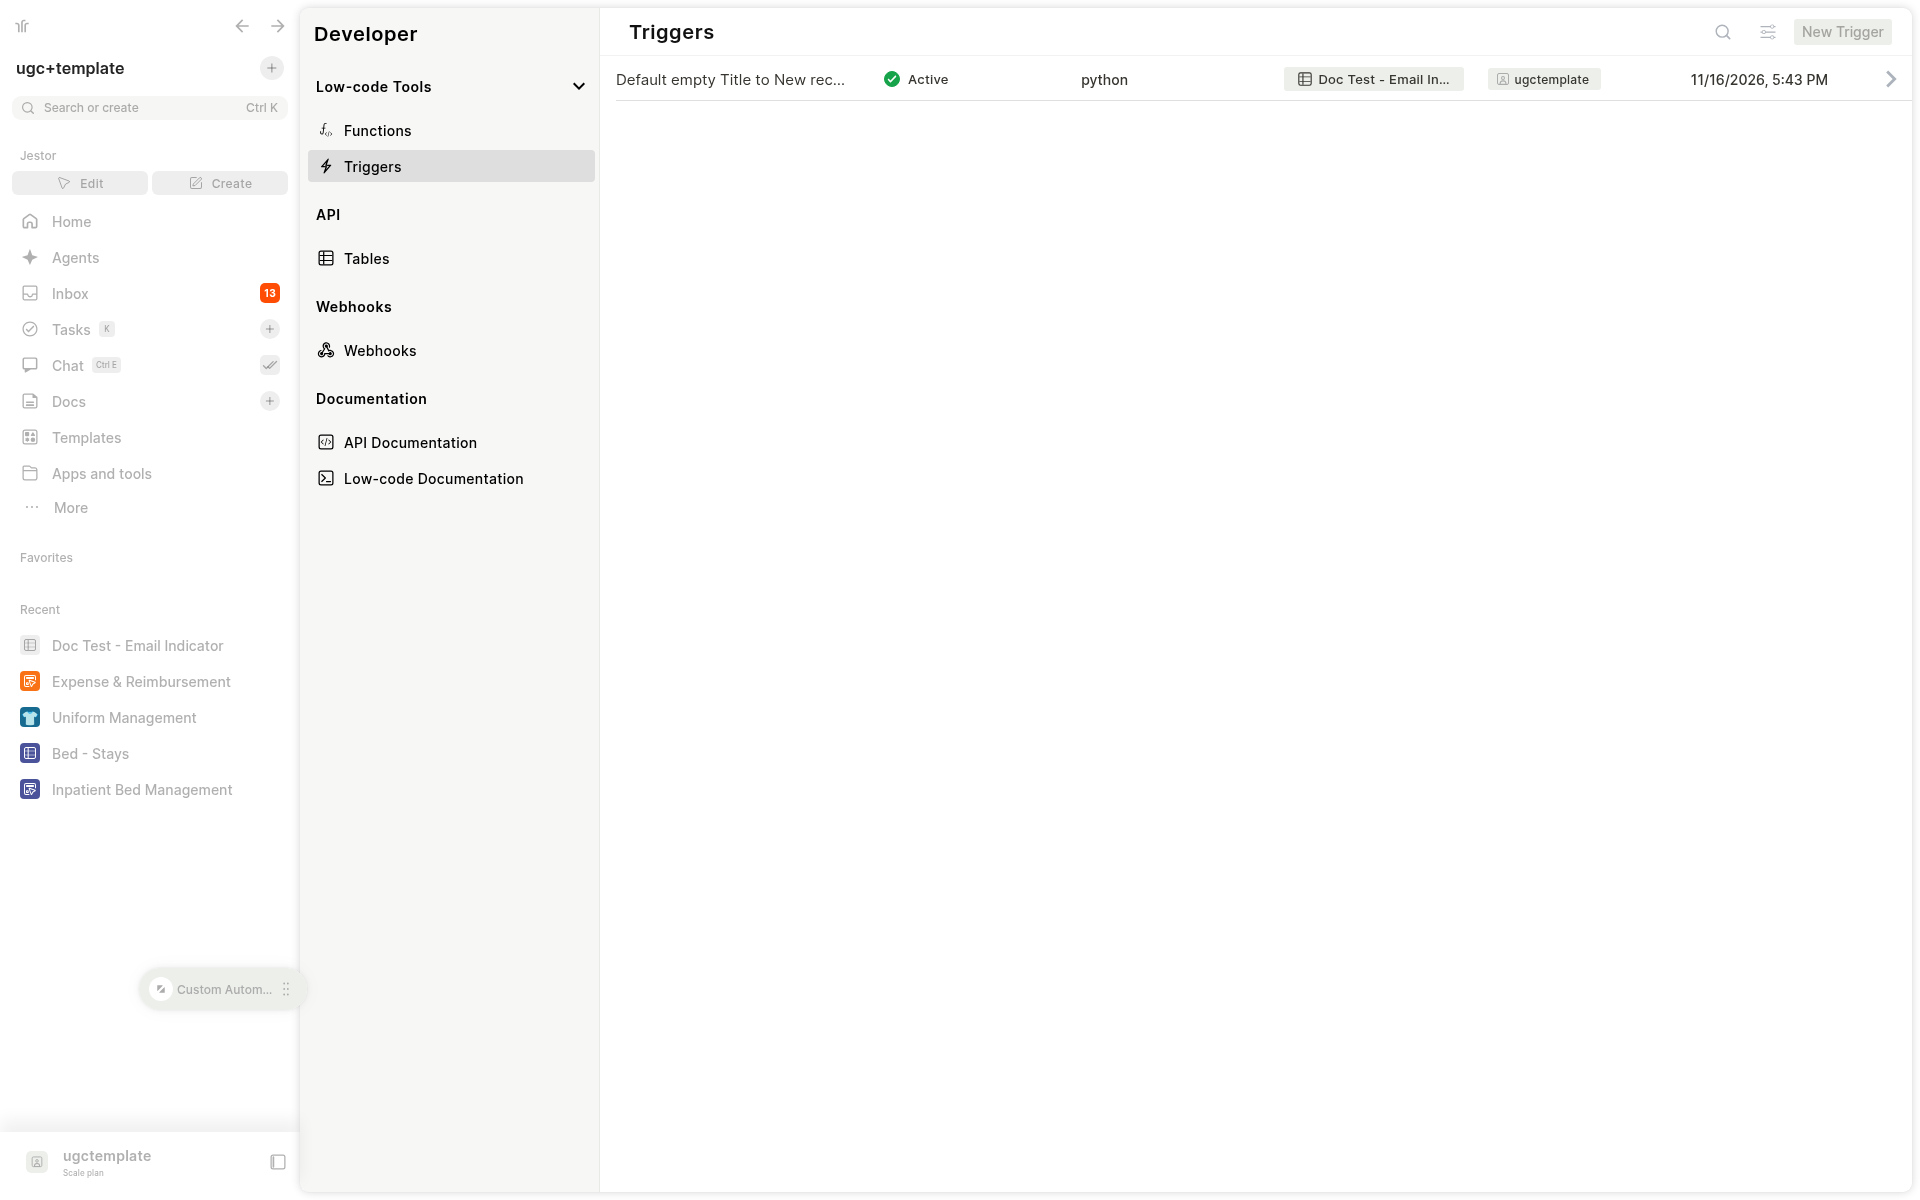
The Developer Area is organized like this:
- Low-code Tools: Functions and Triggers
- API: Tables
- Webhooks
- Documentation: API Documentation and Low-code Documentation
The Triggers list has a New Trigger button. The Functions list has a New Function button.
The low-code editor
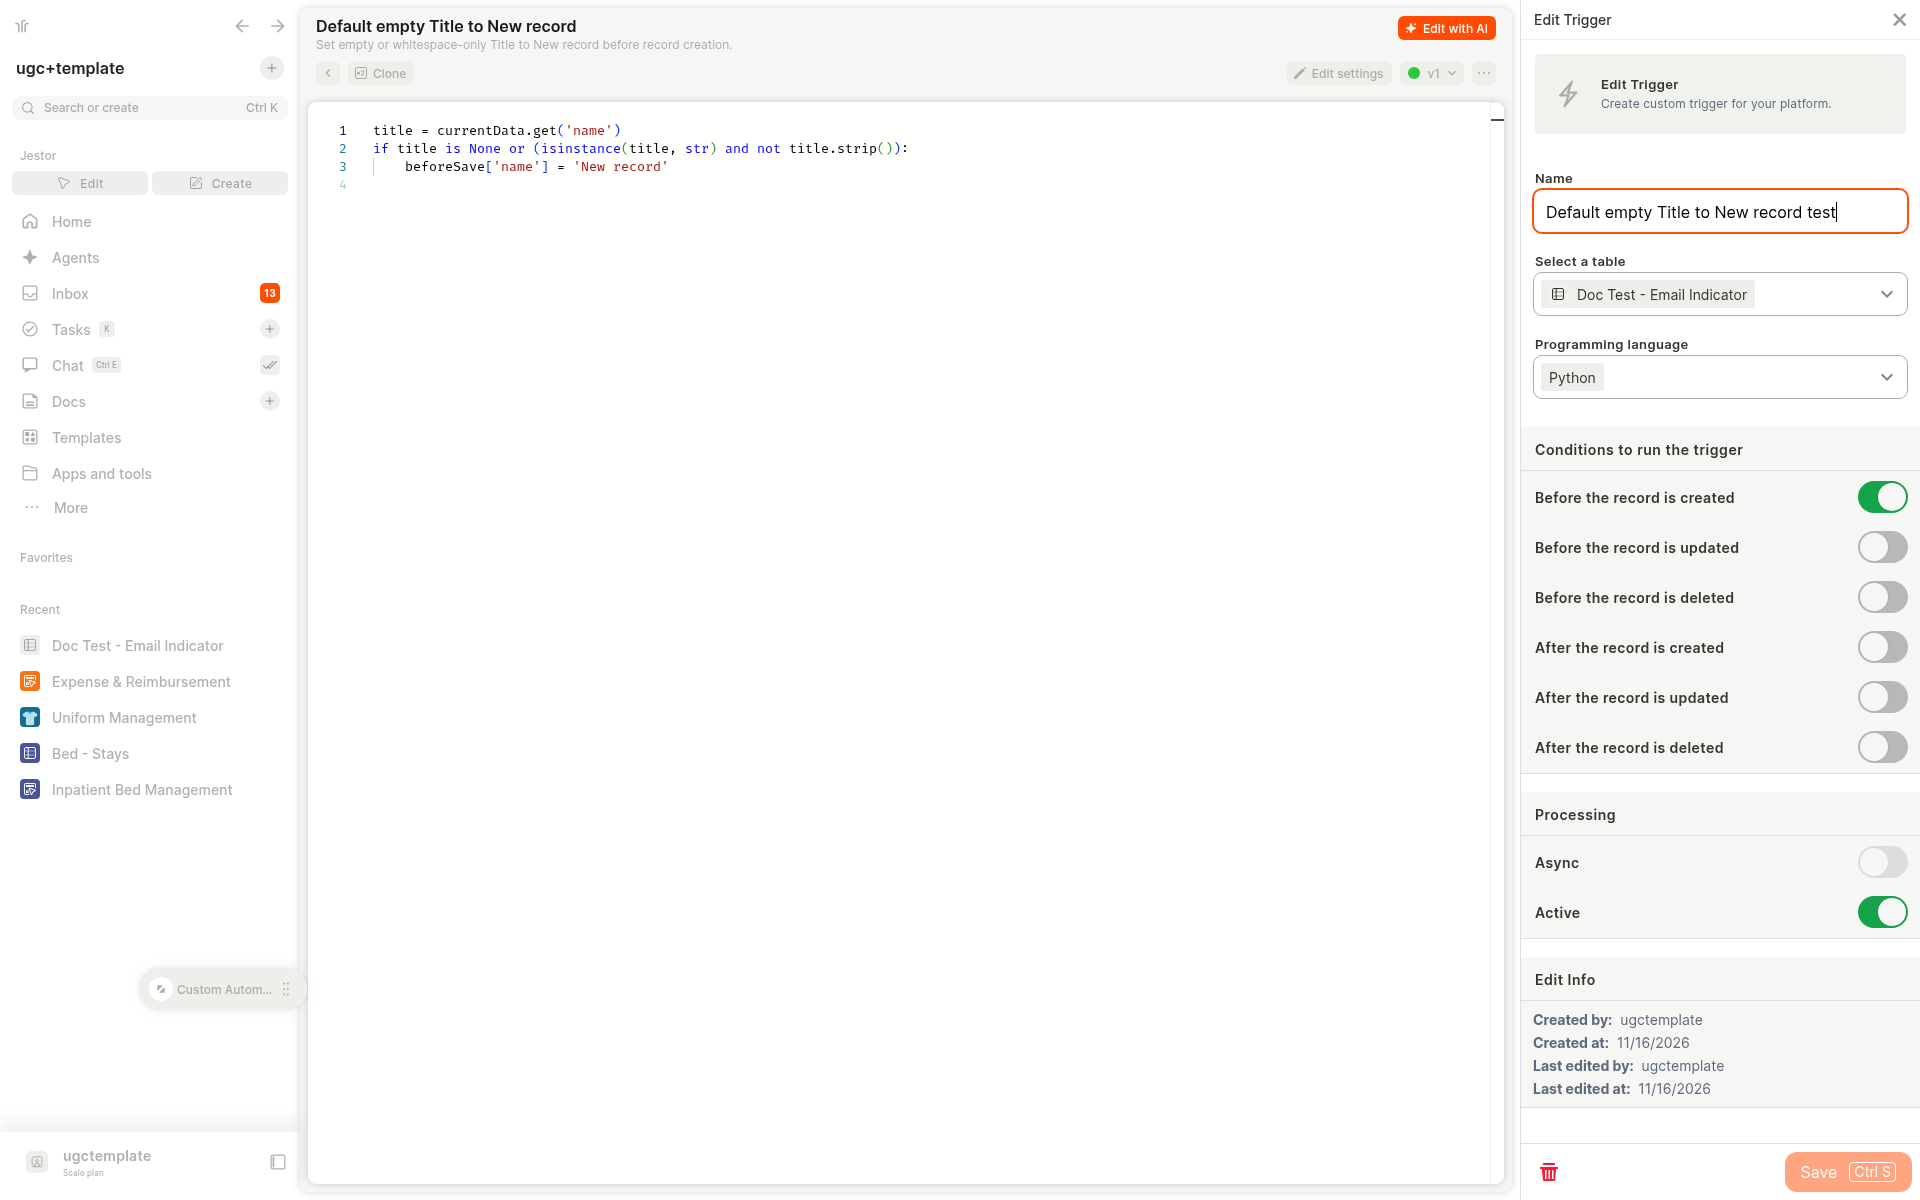
The editor uses an app-style layout, with the code in the middle. The header has:
- <, which goes back to the Developer Area
- Clone, which creates a copy
- Edit settings, which opens the settings panel
- A version tag, such as v1
- Edit with AI
Save (Ctrl+S, ⌘S on Mac) appears at the bottom right after you make an edit.
Edit Trigger
When you click Edit settings on a trigger, the Edit Trigger panel opens. You can set the name, the table, and the programming language (for example, Python).
Under Conditions to run the trigger, you can turn on:
- Before the record is created
- Before the record is updated
- Before the record is deleted
- After the record is created
- After the record is updated
- After the record is deleted
Under Processing, you can set Async and Active. Save your changes with Save (Ctrl+S, ⌘S on Mac).
This panel is the trigger editor itself. To change a trigger through conversation, use Custom Automation.
Related pages
- Custom Automation: create and edit Python low-code functions and triggers from a prompt in Agents.
- Native Automation: generate automations and native integrations from a prompt.
- A simple guide for your first automation
- Webhook
- Action Bar
- Automation
Updated 3 days ago