
Menu Bar
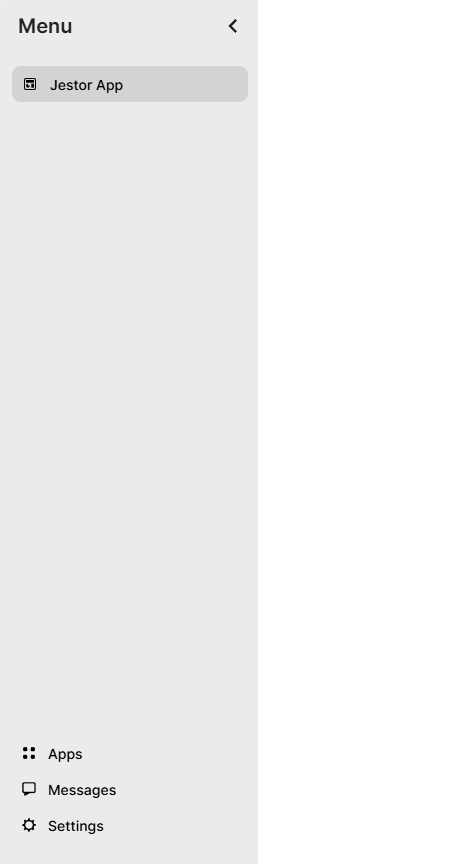
The Menu Bar is a navigation block that displays a persistent sidebar or bottom bar in your app, letting users navigate between apps, access system shortcuts, and perform common actions — all from a single fixed location.
For instructions on how to add a block to your app, see the Blocks page.
Capabilities
- Set a custom title for the menu bar
- Choose separate colors for the top and bottom sections of the bar
- Upload a custom logo to display inside the bar
- Add menu items and menu folders to organize navigation
- Enable system shortcuts like Login, Chat, Go to, Upload Data, and more
- Control visibility, icon size, and label display through preferences
Use cases and examples
Use the Menu Bar when you want to:
- Give users a fixed navigation panel to switch between apps without leaving the current view
- Create a branded sidebar with your company logo and colors
- Group related navigation items into folders for cleaner organization
- Expose shortcuts like Create New, Refresh, or All Tables directly in the menu for faster access
How to configure
Step 1
Add the block: Inside your app page in edit mode, add a Menu Bar block. The edit panel will open on the right side.
Step 2
Set the title: In the Title field, enter the name that will identify this menu. The default is "Menu".
Step 3
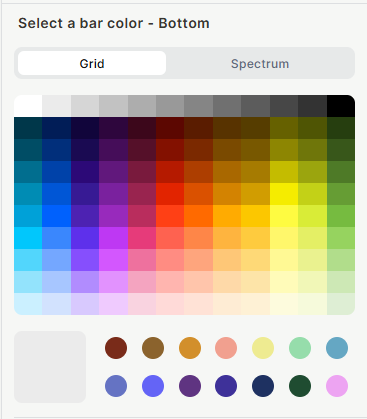
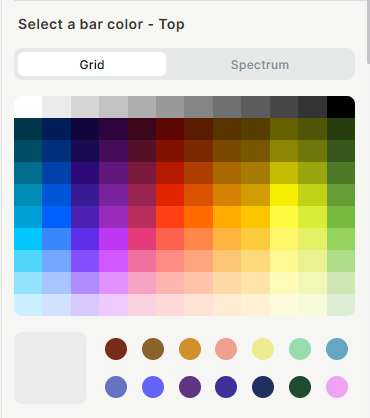
Choose bar colors: Under Customize, you will find two color pickers — one for the Bottom section and one for the Top section of the bar. For each, select a color using the Grid (preset swatches) or switch to Spectrum for the full color range.
Step 4
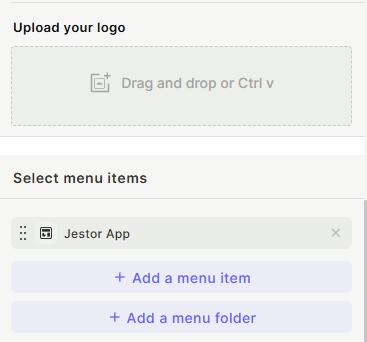
Upload a logo (optional): In the Upload your logo section, drag and drop an image or paste it with Ctrl+V. The logo will appear inside the menu bar.
Step 5
Select menu items: Under Select menu items, click + Add a menu item to add individual navigation links, or + Add a menu folder to group items under a collapsible folder. Items can be reordered by dragging.
Step 6
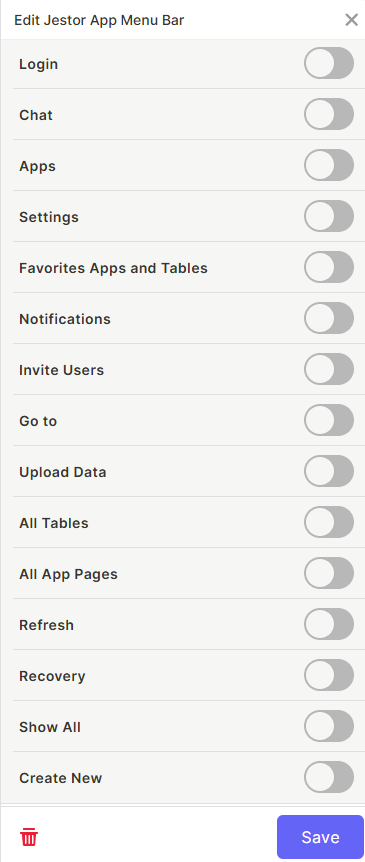
Configure System Shortcuts: Toggle on any shortcuts you want accessible from the menu bar:
- Login — opens the login/logout option
- Chat — opens the in-app chat
- Apps — shows the apps menu
- Settings — opens workspace settings
- Favorites Apps and Tables — shows the user's favorited items
- Notifications — opens the notifications panel
- Invite Users — opens the user invitation flow
- Go to — opens the action bar
- Upload Data — opens the data import flow
- All Tables — shows all tables in the workspace
- All App Pages — shows all pages in the current app
- Refresh — reloads the current view
- Recovery — opens the recovery panel
- Show All — displays all available items
- Create New — opens the app creation flow
Step 7
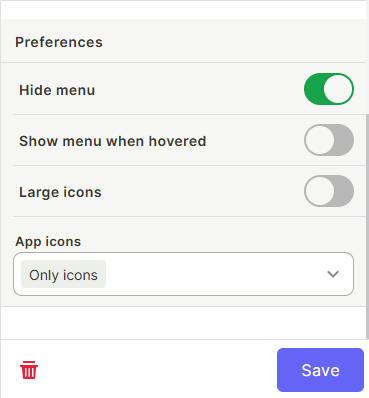
Set preferences: Under Preferences, configure the menu bar behavior:
- Hide menu — hides the menu bar by default
- Show menu when hovered — reveals the bar when the user hovers over the edge of the screen (works together with Hide menu)
- Large icons — increases the size of the navigation icons
- App icons — controls how items are labeled. Options include Only icons (no text labels) or other display modes
Step 8
Save: Click Save to apply all settings.
Keep in mind
- The Menu Bar is global to the app — it appears consistently across all pages and cannot be configured differently per page.
- Hide menu and Show menu when hovered are designed to work together. Enabling only Hide menu without Show menu when hovered will keep the bar permanently hidden unless the user knows how to reveal it.
- The logo does not resize automatically — oversized images may not display correctly inside the bar.
- System Shortcuts are fixed options; you cannot add custom shortcuts beyond those listed.
FAQ
1 — What is the difference between the Menu Bar and the Top Bar?
The Top Bar is a horizontal navigation bar fixed at the top of the app. The Menu Bar is a vertical sidebar or bottom bar. Both handle navigation, but they differ in placement and layout. You can use both in the same app if needed.
2 — Can I add menu folders with items inside them?
Yes. Use + Add a menu folder to create a folder, then add menu items inside it. This is useful for grouping related pages or apps.
3 — If I enable Hide menu, will users lose access to navigation?
Not if you also enable Show menu when hovered. With both toggles on, the bar stays hidden until the user moves the cursor to the edge of the screen, then it slides into view.
4 — Can I use the Menu Bar and still control which apps each user sees?
The Menu Bar displays the items you configure in Select menu items. Access control per user depends on the permissions set in your workspace, not on the menu configuration itself.
5 — Does the App icons setting affect system shortcuts too?
The App icons setting controls the display of the menu items you added. System shortcuts have their own icons and are not affected by this setting.
Updated 3 months ago