
Super Forms
Each Super Form is connected to a table and submits responses to it. You control which fields appear, what order they follow, how the form looks, and how it behaves after submission.
For instructions on how to add a block to your app, see the Blocks page.
What is it
Super Form is Jestor's form system. It lets you build structured, multi-page forms where you control which fields appear, what order they follow, how the form looks, and how it behaves after submission.
Public vs. internal forms
Forms in Jestor can be public or internal:
- Public forms are accessible via a shareable link without requiring the user to be logged in to Jestor. This is how you collect data from clients, partners, or anyone outside your workspace.
- Internal forms are embedded inside the app and are only accessible to users who are logged in. They are part of the day-to-day workflow for your team.
Where forms appear
Beyond public vs. internal, forms also differ in where and how they appear to the user:
App Form (embedded in the page) — A Super Form added as a block directly on an app page. The form is always visible on the page, like any other content block. This is the most common type for public-facing forms — you share the app page link and the user fills it in directly.
Card Form (opens from a card) — Forms that open when a user clicks on a card in a Kanban, an item in a List, or similar blocks. The form appears in a panel or window on top of the current view, not embedded in the page itself. This type is always internal — it is used by logged-in users to create or edit records while navigating the app.
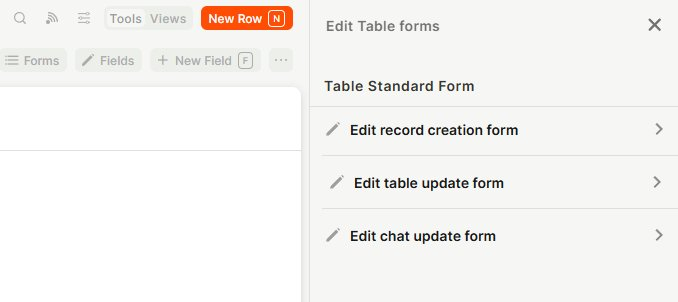
Table Form — Every table in Jestor has three built-in forms that can be configured independently: the Record Creation Form (shown when a user creates a new record), the Table Update Form (shown when a user edits a record from the table view), and the Chat Update Form (shown when a user edits a record from the chat). To access them, open the table, click Forms in the top menu, and select the form you want to edit.
All three types are configured the same way and share the same configuration options.
Capabilities
- Connect the form to any table in your workspace
- Select which fields from the table appear in the form
- Add form blocks (content elements like sections and instructions) alongside fields
- Set a custom title and description for the form
- Use the record's label or description dynamically as the title or description
- Upload a custom logo and cover image, or load them from a record
- Set up conditional logic to show or hide fields based on user input
- Configure what happens after form submission (success page, record update)
- Customize colors, layout, and positioning through form style settings
- Use a Random ID field as the record identifier in public update forms, preventing users from guessing record links (see Random ID)
Use Cases and Examples
A common use for Super Form is onboarding flows — instead of showing every field at once, you break them into logical steps like personal info, preferences, and confirmation. This reduces cognitive load and increases completion rates.
It also works well for intake forms in operations contexts, where different teams submit structured requests (budget approvals, HR requests, client onboarding) and each submission needs to land in a specific table for tracking.
Another common use is secure public update forms. When a public form is used to update existing records (for example, a customer editing their own order or a supplier confirming a delivery), the URL normally includes the record's title as the identifier — which users could tweak to access other records. To avoid this, use a Random ID field as the identifier in the update URL. Because the value is randomized, the pattern cannot be guessed, making the form significantly more secure. To learn how to set it up, see Random ID.
How to configure
Step 1
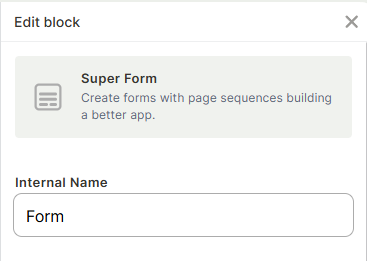
Set the internal name: In the Internal Name field, type a name to identify this form block within the editor. This name is not visible to users — it's only for your reference when managing multiple blocks on the same page.
Step 2
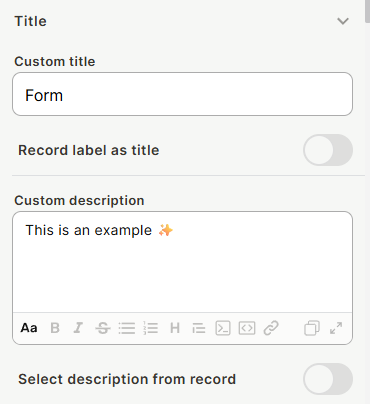
Configure the title: Expand the Title section. You can either type a Custom title in the text field, or enable Record label as title to use the record's label dynamically. Optionally, add a Custom description using the rich text editor below. Enable Select description from record to pull the description from the record instead.
Step 3
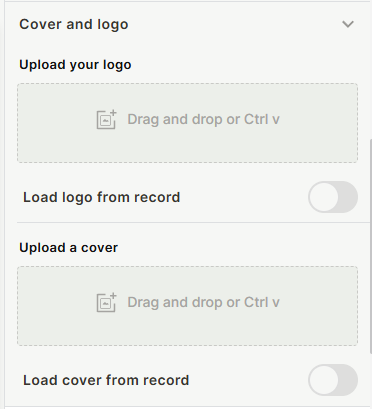
Configure the cover and logo (optional): Expand the Cover and logo section to upload a logo and cover image for the form, or load them dynamically from a record field.
Step 4
Add fields and form blocks: Use the Fields and Form Blocks section to connect the form to a table, select which fields appear, and add content blocks between them. To learn how to do it, see Fields and Form Blocks.
Step 5
Set up form behavior: Use Form Tools to configure conditional logic, manage responses, set up a success page, and define what happens to the record after submission. To learn how to do it, see Form Tools.
Step 6
Customize the appearance: Use Form Style to adjust colors, layout, and element positioning. To learn how to do it, see Form Style.
Keep in Mind
- The three form types (App Form, Table Form, Block Form) are independent — configuring one does not affect the others, even if they are connected to the same table.
- The Internal Name is not displayed anywhere in the published form — it is only visible in the editor.
- Removing a field from the form does not delete it from the table — it only hides it from the form.
FAQ
1 — Can I connect the same Super Form to more than one table?
No. Each Super Form block is connected to a single table. If you need to collect data into multiple tables, you would need separate Super Form blocks.
2 — What is the difference between a field and a form block?
A field maps directly to a column in the connected table and captures user input. A form block is a visual element (like a section title or instruction text) that organizes the form layout but does not store data.
3 — Can I reorder the fields after adding them?
Yes. After adding fields to the form, you can drag them to reorder how they appear to users.
4 — Does the cover image appear on every page of the form, or only the first?
The cover image is configured at the form level and typically appears at the top of the form experience. How it displays across multiple pages depends on the page structure you configure separately.
5 — If I configure the Table Form, does it also change the Block Form inside my Kanban?
No. Each form type is configured independently. Changing the Record Creation Form in the table does not affect the form embedded in a Kanban or any App Form block. If you want your Kanban to use the Table Form, change it in Kanban settings.
Updated 3 months ago