
Chatbot Agent
The Chatbot Agent adds an AI-powered assistant to any app page, allowing users to ask questions and get answers based on data from a Jestor table.
This feature is currently in beta. Some behaviors may change as we continue to improve it.
What is it
The Chatbot Agent is a type of AI agent in Jestor that you can embed directly into an app page. Once configured, it appears as a conversational interface where users can type questions in natural language and receive answers grounded in the records of a connected table.
Unlike a static block, the Chatbot Agent actively reads your data and uses it as context for every response. This means users can ask things like "Which clients haven't responded in the last 30 days?" or "What's the status of order #1042?" and get accurate, data-driven answers, without needing to search or filter manually.
Capabilities
- Answer natural language questions — users can ask questions in plain text and get answers based on real records from a connected table
- Read live table data — the agent queries the table at the time of each conversation, so responses always reflect the current state of the data
- Use context links and files — supplement table data with external URLs or uploaded documents (PDFs, spreadsheets) for richer answers
When to use
Use the Chatbot Agent when:
Users need to query or interpret data without knowing how to filter or navigate tables
The app serves non-technical users who benefit from natural language interaction
You want to surface insights from a table without building custom views for every question
The process involves frequently asked questions that can be answered from structured data (status checks, summaries, lookups)
How to configure
Step 1
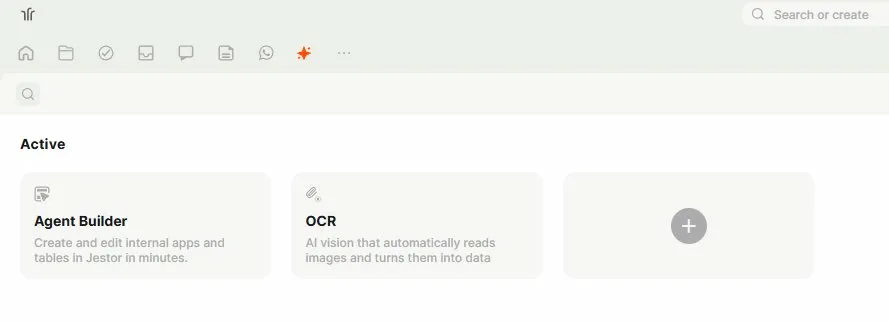
Open the Agents page: In the left sidebar, click the AI (spark) icon to open the Agent Builder. You will see any existing active agents and a + button to create a new one. You can also find and access your existing agents from the Folders page, under the Agents section.
Step 2
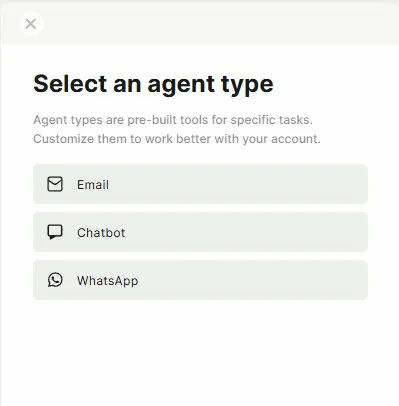
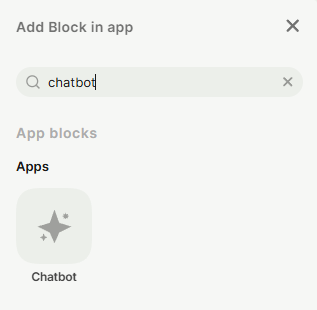
Create a new agent: Click the + button. A modal will appear asking you to select an agent type. Choose Chatbot.
Step 3
Name and describe the agent
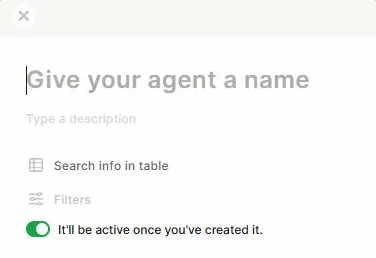
In the configuration panel: Enter a name for the agent in the "Give your agent a name" field. This name is internal and helps you identify the agent in the builder.
Optionally add a description to clarify the agent's purpose for your team.
Step 4
Connect a table: Under Search info in table, select the table the agent will use as its data source. The agent will read records from this table to answer user questions.
Step 5
Set the agent as active: The It'll be active once you've created it toggle is on by default. Leave it on if you want the agent available immediately after saving.
Step 6
Customize the chatbot appearance
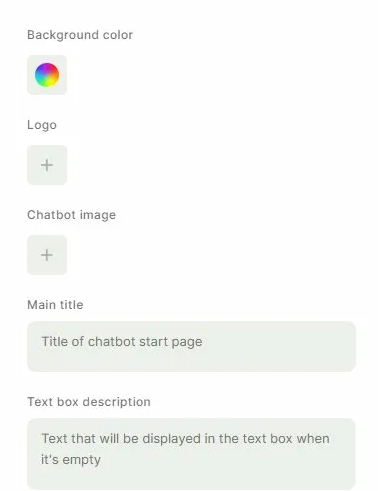
Scroll down to configure how the chatbot looks to end users:
- Background color: sets the color of the chatbot interface
- Logo: upload an image that appears as the brand logo in the chatbot header
- Chatbot image: upload an avatar image that represents the AI in the conversation
- Main title: the title displayed on the chatbot's start page (for example: "Ask anything about your orders")
- Text box description: placeholder text shown inside the input field when it is empty (for example: "Type your question here...")
Step 7
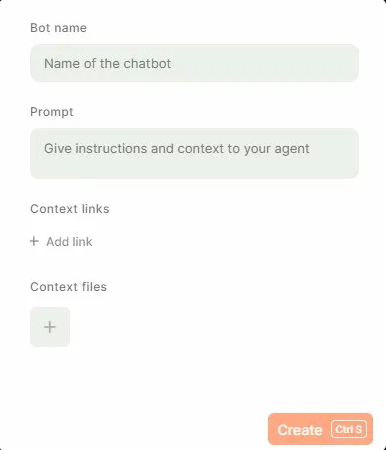
Configure the bot identity and prompt:
- Bot name: the display name shown to users inside the conversation (for example: "Sales Assistant" or "Support Bot")
- Prompt: instructions that define how the agent should behave, what tone to use, what it should focus on, and any constraints. This is where you shape the agent's personality and scope. Example: "You are a sales assistant. Answer only questions related to the pipeline and client status. Always respond in a friendly, concise tone."
Step 8
Add context links and files:
- Context links: add URLs the agent can reference as additional context (for example, a product documentation page or a pricing table), we recommend using the Jestor Documentation link here as context.
- Context files: upload documents (PDFs, spreadsheets) the agent can use alongside the table data to answer questions
Step 9
Create the agent:
Click Create (or press Ctrl+S) to save. The agent will now appear in the Active list in the Agent Builder.
Step 10
Add the agent to an app page:
Open the app page where you want the chatbot to appear. Add the Chatbot block and select the agent you just created. The chatbot interface will render directly on the page.
Keep in Mind
- The agent reads data from the connected table at query time. If records change, the agent will reflect the updated data in subsequent conversations.
- The agent can read up to 50 records per table at a time. If your table has more than 50 records, consider using Filters during configuration to narrow down the data to the most relevant subset.
- Filters applied during configuration limit what data the agent can access. Records excluded by filters will not appear in responses, even if the user asks about them directly.
- The Prompt field is the most important configuration for quality responses. A vague prompt produces generic answers; a specific prompt with clear scope and tone produces consistently useful results.
- Context links and files supplement the table data, they do not replace it. The agent always prioritizes the connected table as its primary source.
- Each chatbot agent is connected to one table at a time. If you need the agent to reference multiple tables, consider consolidating the data using a Lookup or Connected Records field before connecting the agent.
FAQ
1 — Can the Chatbot Agent create or edit records?
No. The Chatbot Agent is read-only. It can retrieve and interpret data from the connected table but cannot modify, create, or delete records.
2 — What happens if the table has no records that match the user's question?
The agent will respond based on the available data. If no relevant records exist, it will typically indicate that no information was found. The quality of this response depends on how the Prompt is configured. A well-written prompt can instruct the agent to give a clear "no results" message instead of a vague answer.
3 — Can I use the same agent on multiple app pages?
Yes. Once an agent is created, it can be added as a block on any app page within the same workspace. Changes to the agent configuration (prompt, table connection, filters) apply everywhere the agent is used.
4 — Does the agent remember previous conversations?
No. Each conversation session is independent. The agent does not retain memory between sessions, so context from a previous conversation will not carry over to a new one.
Updated 4 months ago