
Attachment Vision (OCR)
The Attachment Vision field uses AI to read images and PDF files — like invoices, IDs, and receipts — and automatically fill other fields in the same record with the extracted data.
What is it
Attachment Vision is a table field that applies optical character recognition (OCR) and AI vision to files uploaded by the user. When a file is attached to a record, Jestor AI reads its contents and maps the recognized information to the fields you configured — no manual data entry required.
It works with images (photos of documents, scanned files) and PDFs. Common use cases include processing invoices, onboarding documents, identity cards, bills, and any structured paper form that your team currently fills in by hand.
Capabilities
- Read images and PDFs — works with photos of documents, scanned files, and PDF attachments
- Extract and map data automatically — fills configured fields in the same record with values found in the document
- Accept context guidance — you can provide extra instructions to help the AI interpret ambiguous field names or specific document layouts
- Integrate with automations — since extracted values land in standard fields, automations can be triggered based on those fields after extraction
When to use
- Your team regularly uploads documents (invoices, receipts, contracts, IDs) and then manually copies data from those documents into fields
- You want to reduce input errors caused by retyping
- You need to process a high volume of files and populate records automatically
- You are building an intake or onboarding flow where users upload supporting documents
How to configure
Step 1
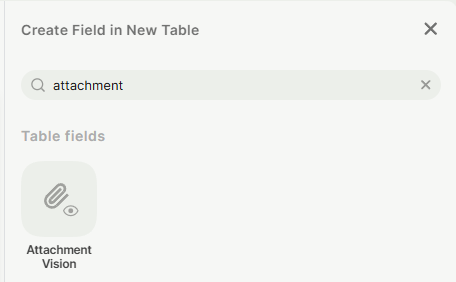
Add the field: Inside a table, click + Add field (or press F) to open the field picker. Search for attachment and select Attachment Vision.
Step 2
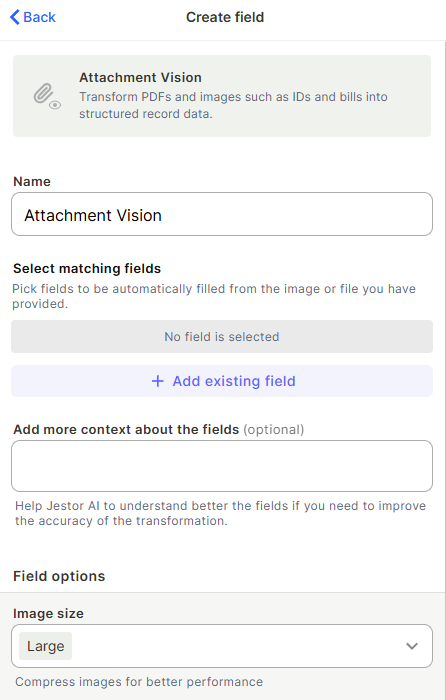
Name the field: Give it a name that reflects what kind of document will be uploaded — for example, Invoice, Identity Document, or Receipt.
Step 3
Select matching fields: Under Select matching fields, click + Add existing field and choose the fields in the same table that should be filled automatically. For example, if you are processing invoices, you might map:
- Supplier name
- Invoice number
- Total amount
- Due date
Each field you add here becomes a target: Jestor AI will try to find the corresponding value in the uploaded document and populate it.
Step 4
Add context (optional): Use the Add more context about the fields text area to give the AI extra guidance. This is useful when field names are ambiguous or when the documents follow a specific layout. Example: "The supplier name is always in the top-left corner. The total amount includes taxes."
Step 5
Configure image size: Under Field options → Image size, choose between compression levels. Large is the default and recommended for most documents. Use a smaller size only if performance is a concern and document quality allows it.
Step 6
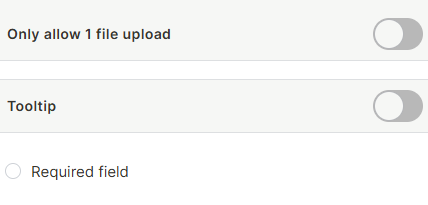
Additional options:
- Only allow 1 file upload — toggle on if each record should have exactly one document. Prevents users from accidentally attaching multiple files to the same record.
- Tooltip — add a short instruction to let users know what to do on this field.
- Required field — mark the field as required if the record should not be saved without an attached file.
Step 7
Create: Click Create to save the field configuration.
Keep in Mind
- Extraction accuracy depends on document quality. Blurry photos, skewed scans, or very low-resolution images may produce incomplete or incorrect results.
- The AI maps values to fields by name and context. If your field names are generic (e.g., Field 1, Value), accuracy will be lower. Use descriptive names and add context in the configuration.
- Only the fields you explicitly configured as matching fields will be filled. Other fields in the table are not affected.
Very long PDFs with many pages may take longer to process and may yield less precise results if the relevant data is spread across pages.
FAQ
1 — What happens if the AI extracts a wrong value?
The extracted values are written to regular fields. You can edit them manually after the extraction, just like any other field. No data is locked — the AI result is a starting point, not a final answer.
2 — Can I use Attachment Vision alongside an automation?
Yes. Since Attachment Vision fills standard fields, you can trigger automations based on those fields after extraction. For example, you could trigger a notification or status change once the Invoice number field is populated.
3 — Does the "Only allow 1 file upload" option prevent replacements?
No. The toggle limits the number of files attached at the same time to one, but the user can still remove the current file and upload a new one. Each new upload triggers a fresh extraction.
4 — Can I add more matching fields after the field is created?
Yes. Edit the field configuration at any time and add or remove matching fields. Changes apply to future uploads — records that were already processed are not affected retroactively.
Updated 4 months ago