Conditional Fields
Define when to show fields according to pre-set conditions.
What are conditional fields in Jestor?
With conditional fields you can add custom rules to your Tables and Kanbans and define when to show, hide or make them required according to the conditions you choose.
For example:
- Show different fields at each stage of your Kanban;
- Select specific fields for new cards or records (instead of all fields);
- Group many conditions together using OR and AND operators.

How to create conditional fields in Jestor?
1. Access the conditional fields creation/editing page:
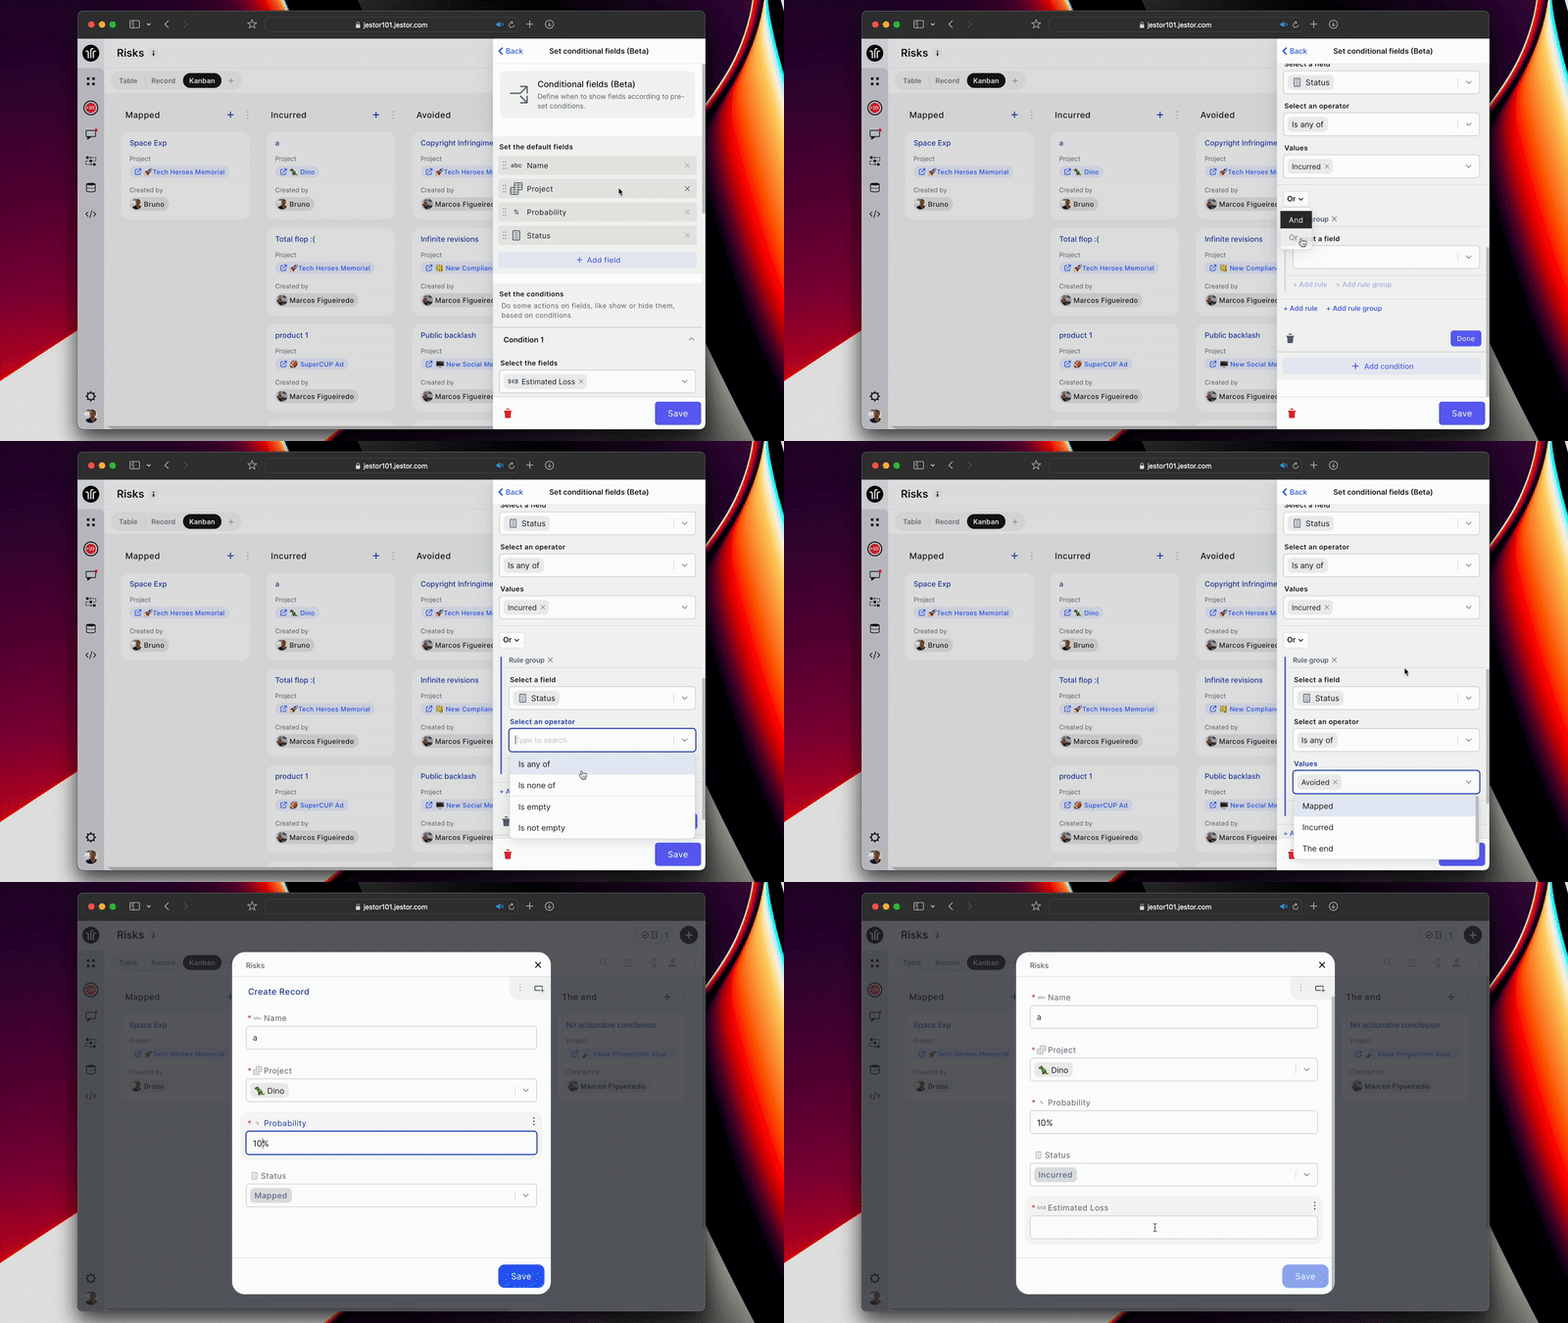
Access your table and click on the conditional fields icon in the upper right corner of the screen, as in the image below, and this will open the conditional fields creation/editing page.
2. Set default fields:
On the create/edit screen, first define the fields that will appear by default when you open a record in your table or in your kanban card.
You can remove a field from your record's view by clicking on the "x" and/or add new fields by clicking on the button just below "+ Add field".
3. Set the conditions:
In this part you will define some actions on the fields, like showing or hiding them, based on the conditions of your choice.
Click the "+ Add condition" button to start creating the rules:
4. Setting the first condition:
- Select the fields that will be acted upon when the condition to be chosen is met. You can select more than one field;
- Select one of the actions:
- Hide;
- Show;
- Make required;
- Make optional.
Define now "When" the chosen action will occur, what will be the necessary conditions for it to occur:
- Select a field and then the option to select an operator will appear;
- Select an operator, as in the image below:
The types of operators that will appear will vary according to the field type chosen, such as single option field (example above), date, text and number.
- After defining the operator, the Values field will appear for you to define one.
It will also vary according to the type of field chosen, and a list of options may appear, as in the case of the single option field or a text box for you to write the value.
By setting the value, you can click the "OK" button to complete your condition, or you can add more rules for the chosen action to occur, or define more than one group of rules.
5. Adding more than one rule or rule group (Optional):
The "+ Add rule" is used for you to define one more rule to your conditional, following the same steps shown above.
- "AND" - It will be a condition that must be met together for the chosen action to occur;
- "Or" - Both this and the other condition can be met for the chosen action to occur.
You can add as many rules as needed.
6. Ending condition:
Once the rules are defined, by clicking "Ok" your condition will be completed. You can access it to check/edit it by clicking on its name.
Remember, you can create numerous different conditions for your Tables and Kanbans by clicking the "+ Add condition" button
After creating the conditions, click Save and test the created conditions!
Updated 3 months ago
